How to Upgrade ESXi 6 7 to 7 0 without vCenter
15:35 05/10/2024 | 342If you don’t have vCenter and are still running a couple of ESXi hosts, which are not managed by vCenter server appliance (VCSA), you still need to upgrade ESXi to the latest version.
You can also be in a situation where you are running just vSphere Essentials Kit, which does not have the vMotion license, so you cannot use vSphere Lifecycle Manager (previously vSphere Update manager) to update your host where VCSA is running because you cannot put the host into the maintenance mode. vSphere Lifecycle Manager (vLM) is a preferred tool, but for smaller environments you need alternatives. The alternative is a manual upgrade of ESXi.
In this case, you have to shut down VCSA and all the other VMs running on a particular host, and then do a manual upgrade.
You should also know that if your hardware is server hardware of a particular vendor, there might be a particular ESXi ISO to download because this ISO will contain the vendor’s VIBs and drivers needed by your hardware.
If you use the general ESXi 7.0 ISO, you might have issues with VIBs installed by your previous ESXi version.
A. Manual upgrade of ESXi 6.7 to 7.0 can be done several ways
At first, you’ll have to go and download either an upgrade file (also called Offline Bundle) or the full-blown ESXi 7.0 ISO file.
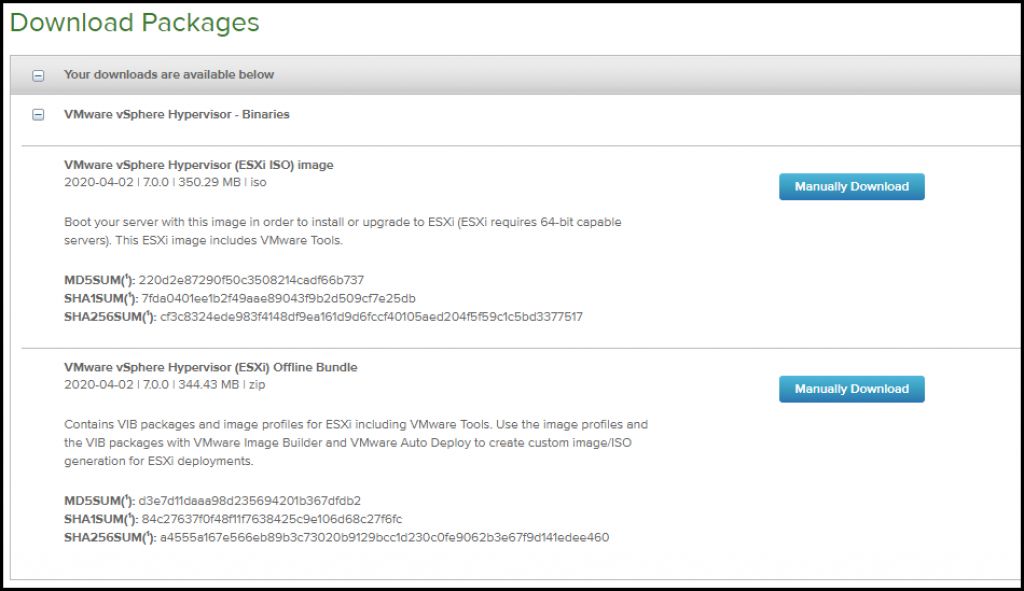
Download ESXi 7.0 ISO image or Offline Bundle
You can burn the ISO onto a CD-ROM drive and do the upgrade via ISO.
The difference is that the ISO you can boot and follow the upgrade instruction on the screen without knowing any CLI commands, while the Offline Bundle you proceed with an upgrade, via CLI.
Let’s walks us through both ways.
Via User interface at the console – after downloading the latest ESXi 7.0 iso, create a USB ESXi installer via some software (check our post here – Create an ESXi 6.5 installation USB under two minutes ). You’ll then plug-in this USB into your server and reboot (you’ll need to specify the USB boot option in the BIOS).
After you boot on the installer (USB or CD-ROM), you’ll simply choose the “Upgrade ESXi, preserve VMFS datastore” option (default) which allows you to keep all files and VMs which you might store and use instead of just wiping everything.
If you’re running into problems with your VIBs (which might be VIBs for your network cards for example) and you must uninstall them before proceeding with the upgrade, the ISO upgrade option might be the way to do so. Otherwise, you won’t be able to connect to the host and do the upgrade.
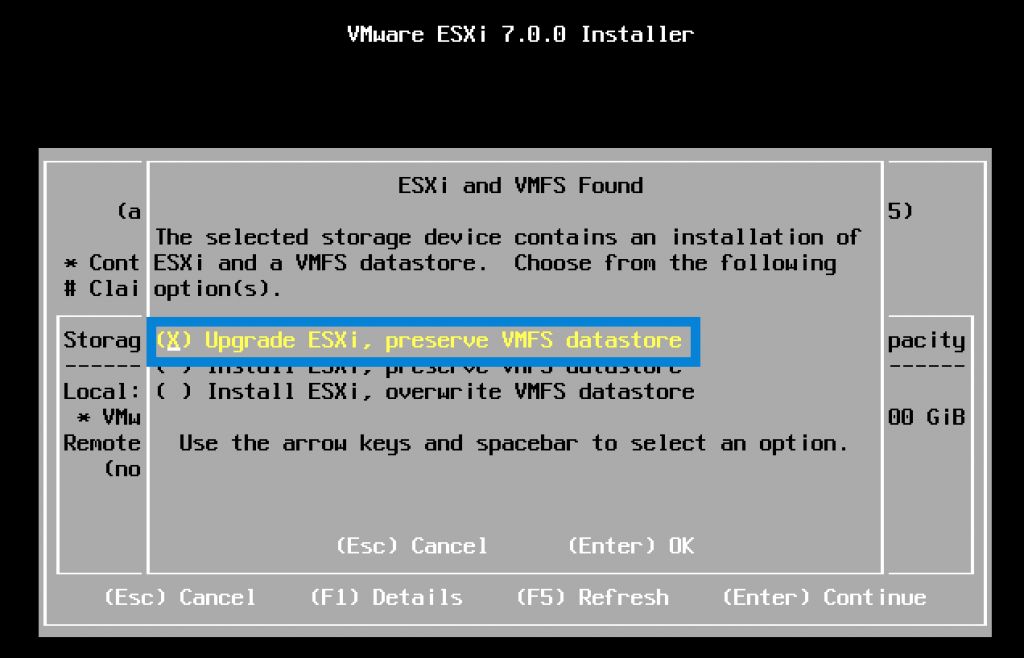
Upgrade and preserve VMFS datastore
B. Remote upgrade if you don’t have access to the console
There might be situations (rare) that you don’t have access to the server room and the console. This can be an individual host at the remote office for example. In this case, you can connect remotely to this host (via jumpbox) and proceed with an upgrade via CLI.
1. Upload the Zip bundle to a datastore visible by ESXi host
You can do that via the host client or via CLI. Host client is easier…

Upload the Offline Bundle to a datastore visible by ESXi host
2. Put the host into maintenance mode
Shut down all your VMs running on the host and put the host into maintenance mode.
Via CLI:
esxcli system maintenanceMode set –enable true
Via Host web UI:
Connect to your host via host client > right-click > Enter maintenance mode.
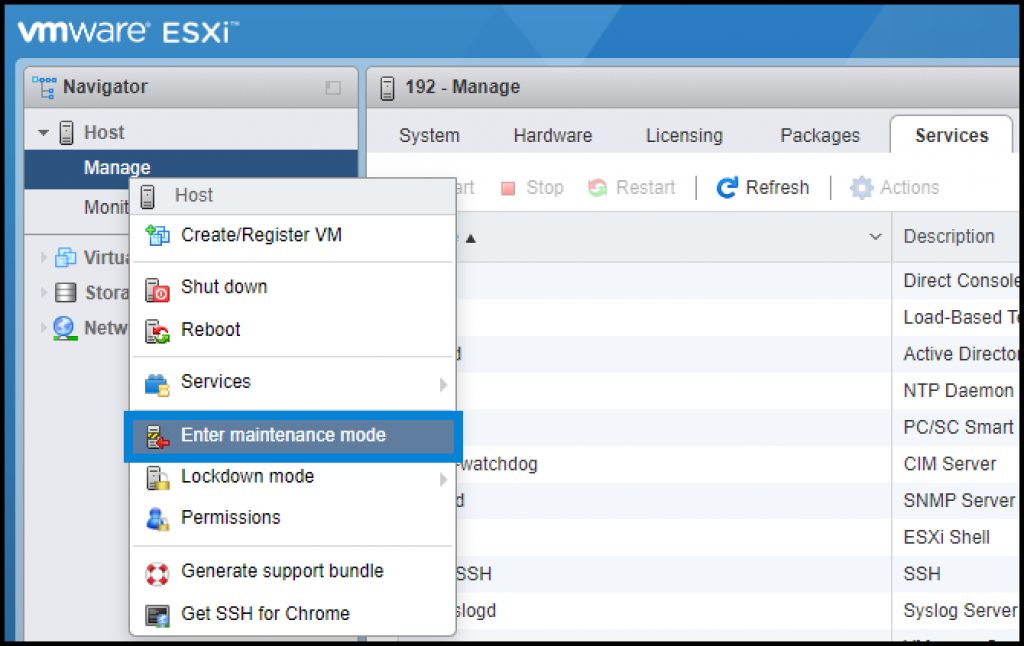
Right click the host and enter Maintenance mode
3. Use esxcli command line – after connecting via SSH client (don’t forget to enable SSH access), run the esxcli command to view the image profiles within the ZIP bundle.
And the command for this is like this. In our case, we have a datastore named “datastore1”.
esxcli software sources profile list -d /vmfs/volumes/datastore1/VMware-ESXi-7.0.0-15843807-depot.zip
And then copy the highlighted text as this is the image we want to use for our upgrade. The other image is used for ESXi versions which are not installed, but PXE is booted so the image is more “lightweight” as it does not contain all the VMware tools packages.
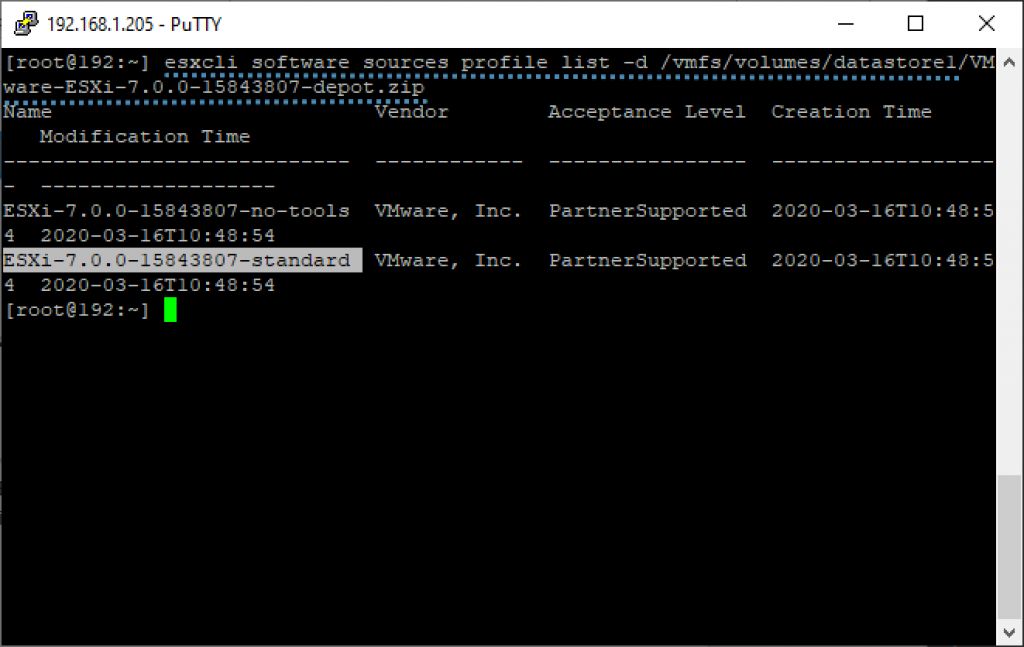
Check the ZIP file for image profiles
Next, launch this command and in the end, append the name of the Image name.
esxcli software profile update -d /vmfs/volumes/datastore1/VMware-ESXi-7.0.0-15843807-depot.zip -p ESXi-7.0.0-15843807-standard
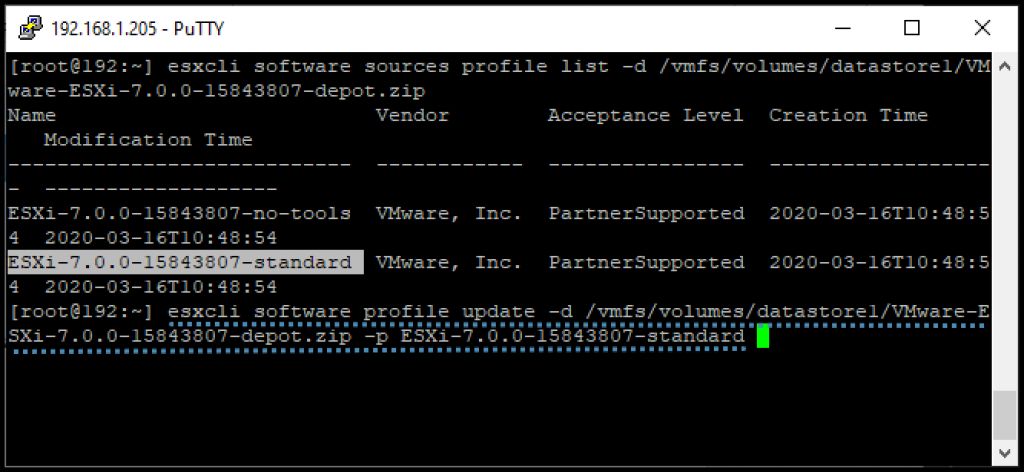
Launch the upgrade via CLI
Then you should wait for the “successful” message. After the ESXi host has upgraded successfully, you see the following message:
The update completed successfully, but the system needs to be rebooted for the changes to be effective.
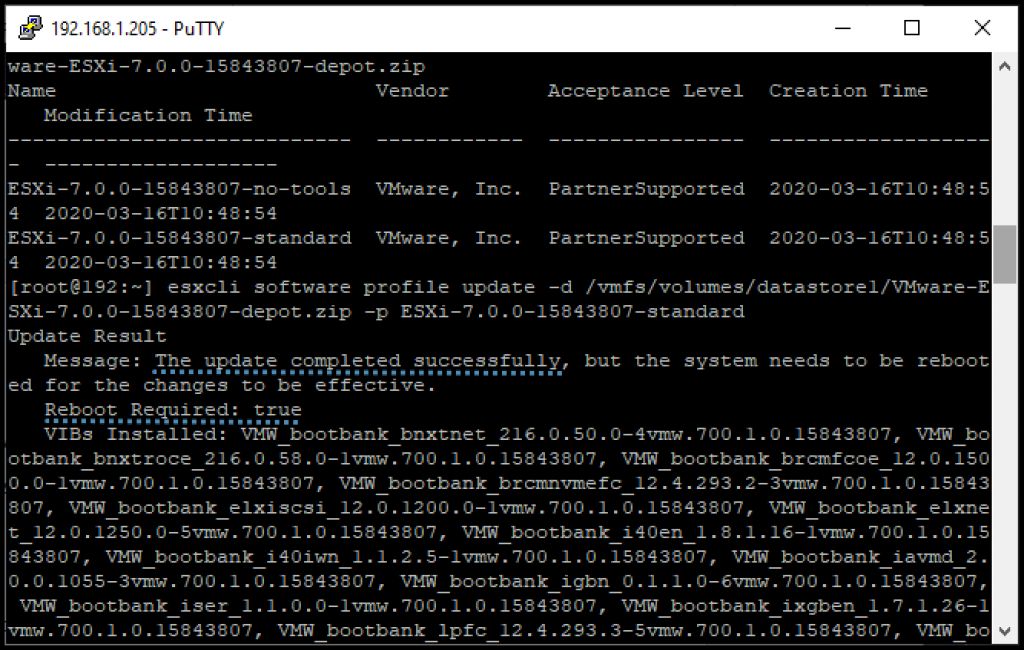
Message of successful upgrade
You’re done. Exit the Maintenance mode and Reboot your host.
After reboot, connect via UI and you should have the latest version.

Our host is upgraded to ESXi 7.0
Final Words
This is not the only way to upgrade ESXi hosts, but the easiest, considering that vCenter and vSphere Lifecycle Manager (vLM) weren’t available for the job. VMware always privileges the vLM as it can scale and upgrade many hosts within a cluster, one after another.
It is a fully automated process where host after host, VMs are evacuated to other hosts via vMotion, a host is then put into maintenance mode, upgraded, exit Maintenance mode, vMotion VMs back. Then, next host. All this is automated within VMware cluster.
Imagine upgrading more than 5 hosts one by one manually. This is already a tedious task, and you’ll be looking to automate it.
You might be able to upgrade individual hosts via a script, but in this case, you’d have to have similar setups on the hardware (similar or identical storage, etc) otherwise it’s difficult to pass different variables to match each different ESXi host.
Nguồn: starwindsoftware.com/blog/how-to-upgrade-esxi-6-7-to-7-0-without-vcenter/;Cùng chuyên mục Tài Liệu Công Nghệ
How to add a USB Disk as VMFS Datastore in ESXi (309) 30/09/2024
Wubuntu – New Linux Distro looks like Windows 10 - 11 (238) 15/09/2024
How To Install and Configure GitLab on Ubuntu (268) 12/09/2024
How to setup your own SVN (subversion) server in Ubuntu 20 (341) 11/09/2024
Centos 7 Extend partition with unallocated space (292) 08/09/2024
How to scan CentOS server for malware (251) 08/09/2024
Cài đặt Tomcat 9 trên CentOS 7 (192) 08/09/2024

